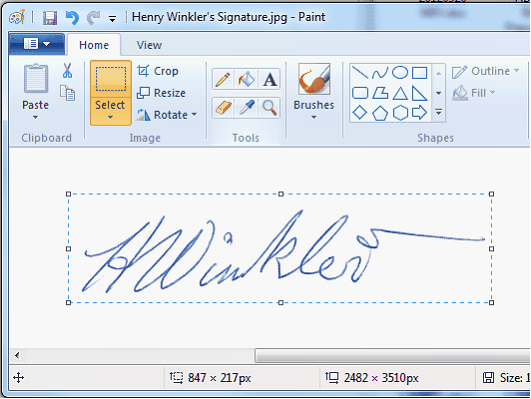
Follow the instructions below to create a signature that can be used with ADLForms Signature Fields:
1. |
Sign a blank piece of white paper (off-white paper is not acceptable)
|
|
2. |
Scan the page into .jpg, .jpeg, .tif, .gif, .bmp or .png format (.pdf format is not acceptable) and save to your computer
|
|
3. |
Click your ‘Windows Start’ button (bottom left corner of your screen)
|
|
4. |
From the ‘Accessories’ folder in your programs list (All Programs), open ‘Paint’ (‘MS Paint’ in Windows 10)
|
|
5. |
Within ‘Paint’, from the ‘File’ menu select ‘Open’ to open the image file of your signature
|
|
6. |
If using Windows 7, 8 or 10 follow the instructions below:
|
|
|
a. |
Choose the ‘Select’ tool in the toolbar
|
|
b. |
Draw a box around your signature (try to have the box as tightly fitting around your signature as possible)
|
|
c. |
Click the ‘Crop’ tool in the toolbar
|
|
If using Windows Vista follow the instructions below:
|
|
|
a. |
Choose the ‘Box Selection’ tool in the toolbar (located top right corner of the toolbar)
|
|
b. |
Draw a box around your signature (try to have the box as tightly fitting around your signature as possible)
|
|
c. |
Select ‘Cut’ from within the ‘Edit’ menu
|
|
d. |
Select ‘Attributes’ from within the ‘Image’ menu and set both the Width and Height to 1
|
|
e. |
Select ‘Paste’ from within the ‘Edit’ menu
|
7. |
Your signature should now fill the image with a small amount of white space around it. If it doesn’t, repeat Step 6
|
|
8. |
Save your signature image
|
|
